Monday, 4 December 2017

Tile Integration with Spring


Tile integration with Spring.


My System configuration:

Windows 10
Spring Tool Suite
Platform: Eclipse Neon.1 (4.6.1)
java version "1.8.0_131"


To create Tile Integration with Spring we have to follow these steps:


1)Create a maven project


2)Select Maven project
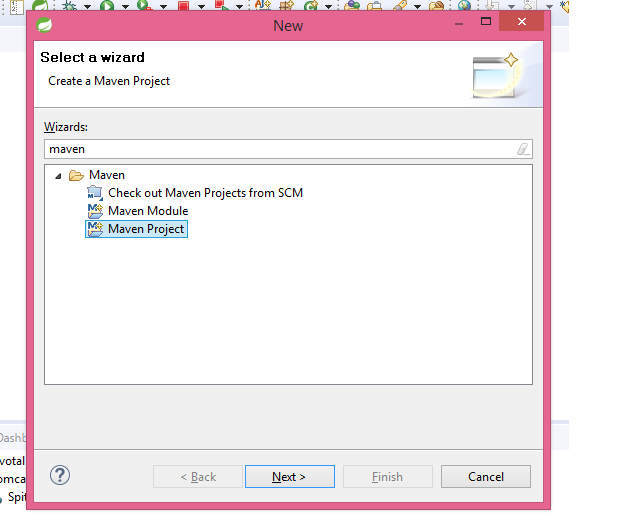


3) Select option create a simple project(skip archetype selection)


4) Give group id and artifact id and some extra details and then finish.


After this step our maven project will be created but showing some error.
One error is inside pom.xml



*Note: This image is for explanation purpose only, value of tag may be different from current project.
           Please follow only error part and how to remove.


If u hold your mouse on cross sign/error place then u can see this


and the message is:
                             web.xml is missing and <failOnMissingWebXml> is set to true

To avoid this problem we have to add some code in pom.xml (I will show u shortly).

Second thing is not an error but it is showing older version of Deployment Descriptor. We have to change this too.


Now my pom.xml

<project xmlns="http://maven.apache.org/POM/4.0.0" xmlns:xsi="http://www.w3.org/2001/XMLSchema-instance" xsi:schemaLocation="http://maven.apache.org/POM/4.0.0 http://maven.apache.org/xsd/maven-4.0.0.xsd">
  <modelVersion>4.0.0</modelVersion>
  <groupId>org.asif.tile</groupId>
  <artifactId>TileSpringIntegration</artifactId>
  <version>0.1</version>
  <packaging>war</packaging>
  <name>Tile Integration with Spring</name>
  <description>In this project I am integrating tile with spring4</description>
  
  <properties>
  <project.build.sourceEncoding>UTF-8</project.build.sourceEncoding>
  <jdk.version>1.8</jdk.version> 
  <spring.version>4.3.10.RELEASE</spring.version>
  <maven.compiler.version>3.1</maven.compiler.version>
  <maven.war.version>2.6</maven.war.version>
  <javax.validation.constraint.version>2.0.0.Final</javax.validation.constraint.version>
  </properties>
  
  <build>
     <plugins>
         <plugin>
          <groupId>org.apache.maven.plugins</groupId>
          <artifactId>maven-compiler-plugin</artifactId>
          <version>${maven.compiler.version}</version>
          <configuration>
              <source>${jdk.version}</source>
              <target>${jdk.version}</target>
          </configuration>
      </plugin>
     
      <!-- To avoid web.xml error -->
         <plugin>
             <groupId>org.apache.maven.plugins</groupId>
             <artifactId>maven-war-plugin</artifactId>
             <version>${maven.war.version}</version>
             <configuration>
                 <failOnMissingWebXml>false</failOnMissingWebXml>
             </configuration>
         </plugin>
     </plugins>
   </build>

<dependencies>

<dependency>
     <groupId>jstl</groupId>
     <artifactId>jstl</artifactId>
     <version>1.2</version>
</dependency>

<dependency>
   <groupId>javax.servlet</groupId>
   <artifactId>jstl</artifactId>
   <version>1.2</version>
</dependency>

<dependency>
            <groupId>javax.servlet</groupId>
            <artifactId>javax.servlet-api</artifactId>
            <version>3.1.0</version>
            <scope>provided</scope>
        </dependency>
        
<dependency>
    <groupId>javax.servlet.jsp</groupId>
    <artifactId>jsp-api</artifactId>
    <version>2.1</version>
    <scope>provided</scope>
</dependency>

<dependency>
    <groupId>taglibs</groupId>
    <artifactId>standard</artifactId>
    <version>1.1.2</version>
</dependency>

<dependency>
  <groupId>org.springframework</groupId>
  <artifactId>spring-core</artifactId>
  <version>${spring.version}</version>
</dependency>
 
<dependency>
  <groupId>org.springframework</groupId>
  <artifactId>spring-web</artifactId>
  <version>${spring.version}</version>
</dependency>
 
<dependency>
  <groupId>org.springframework</groupId>
  <artifactId>spring-webmvc</artifactId>
  <version>${spring.version}</version>
</dependency>
 
<dependency>
     <groupId>org.springframework</groupId>
     <artifactId>spring-test</artifactId>
     <version>${spring.version}</version>
     <scope>test</scope>
</dependency>
 
<dependency>
     <groupId>junit</groupId>
     <artifactId>junit</artifactId>
     <version>4.12</version>
     <scope>test</scope>
</dependency>

<dependency>
    <groupId>org.apache.commons</groupId>
    <artifactId>commons-lang3</artifactId>
    <version>3.6</version>
</dependency>
 
<dependency>
    <groupId>org.springframework</groupId>
    <artifactId>spring-test</artifactId>
    <version>4.3.10.RELEASE</version>
    <scope>test</scope>
</dependency>
 
<dependency>
    <groupId>org.mockito</groupId>
    <artifactId>mockito-all</artifactId>
    <version>1.10.19</version>
    <scope>test</scope>
</dependency>
 
<dependency>
    <groupId>javax.validation</groupId>
    <artifactId>validation-api</artifactId>
    <version>${javax.validation.constraint.version}</version>
</dependency>

<dependency>
    <groupId>org.apache.tiles</groupId>
    <artifactId>tiles-jsp</artifactId>
    <version>3.0.7</version>
</dependency>
 
</dependencies>

</project>


After saving pom.xml you have to upate maven project.
Even after this if you observe deployment descriptor still it is showing old version like this


*Note: This image is for explanation purpose only, value of tag may be different from current project.

           Please follow only error part and how to remove.


To change it to latest version we have to close project and then open again.

Now once I closed project and open again then you can see change


*Note: This image is for explanation purpose only, value of tag may be different from current project.
           Please follow only error part and how to remove.


You can check that now Deployment descriptor becomes 3.1 previously it was 2.5.


Simply maven update your project.
Now our project is created and having no error.


We will see our coding part now.
In this project for all configurations we are using Java class only, no xml file.


First we will create TileWebConfig class in which we will do configuration of our tile.
Here is our class


package org.asif.tile.config;

import org.springframework.context.annotation.Bean;
import org.springframework.context.annotation.ComponentScan;
import org.springframework.context.annotation.Configuration;
import org.springframework.web.servlet.ViewResolver;
import org.springframework.web.servlet.config.annotation.DefaultServletHandlerConfigurer;
import org.springframework.web.servlet.config.annotation.EnableWebMvc;
import org.springframework.web.servlet.config.annotation.WebMvcConfigurerAdapter;
import org.springframework.web.servlet.view.tiles3.TilesConfigurer;
import org.springframework.web.servlet.view.tiles3.TilesViewResolver;

@Configuration
@EnableWebMvc //Enable Spring MVC
@ComponentScan("org.asif.tile.web") //Enable component-scanning
public class TileWebConfig extends WebMvcConfigurerAdapter{

@Bean
public TilesConfigurer tilesConfigurer(){
TilesConfigurer tilesConfigurer = new TilesConfigurer();
tilesConfigurer.setDefinitions(new String[]{"/WEB-INF/layout/tiles.xml"});
tilesConfigurer.setCheckRefresh(true);
return tilesConfigurer;
}


@Bean
public ViewResolver viewResolver() {
return new TilesViewResolver();
}

//configure static content handling
@Override
public void configureDefaultServletHandling(DefaultServletHandlerConfigurer configurer){
configurer.enable();
}

}


*NOTE: If you change your package name then please don't forget to change 
@ComponentScan("Here please give your package name")

If you forgot to change package name or any miss match to provide proper package then may be project deploy and you can see your project in tomcat manager but if you try to access your project it gives you error that path not found.
Please take care of this.

tilesConfigurer.setDefinitions(new String[]{"/WEB-INF/layout/tiles.xml"});
This is the place where I have to keep my tiles.xml file.


Spring web Initialize class 

package org.asif.tile.config;

import org.springframework.web.servlet.support.AbstractAnnotationConfigDispatcherServletInitializer;

public class TileSpringIntegrationWebAppInitializer  extends AbstractAnnotationConfigDispatcherServletInitializer{

@Override
protected Class<?>[] getRootConfigClasses() {
return new Class<?>[]{RootConfig.class};
}

//Specify configuration class
@Override
protected Class<?>[] getServletConfigClasses() {
return new Class<?>[]{TileWebConfig.class};
}

//Map DispatcherServlet to /
@Override
protected String[] getServletMappings() {
return new String[]{"/"};
}

}


RootConfig class

package org.asif.tile.config;

import org.springframework.context.annotation.ComponentScan;
import org.springframework.context.annotation.ComponentScan.Filter;
import org.springframework.context.annotation.Configuration;
import org.springframework.context.annotation.FilterType;
import org.springframework.web.servlet.config.annotation.EnableWebMvc;

@Configuration
@ComponentScan(basePackages={"org.asif.tile"}, excludeFilters={@Filter(type=FilterType.ANNOTATION, value=EnableWebMvc.class)})
public class RootConfig {

}


tilesConfigurer.setDefinitions(new String[]{"/WEB-INF/layout/tiles.xml"});
This is the place where I have to keep my tiles.xml file.

First we have to create folder "WEB-INF" inside webapp folder and then "layout" folder.


tiles.xml

<?xml version="1.0" encoding="ISO-8859-1" ?>
<!DOCTYPE tiles-definitions PUBLIC "-//Apache Software Foundation//DTD Tiles Configuration 3.0//EN" "http://tiles.apache.org/dtds/tiles-config_3_0.dtd">
<tiles-definitions>
<definition name="base" template="/WEB-INF/layout/page.jsp">
<put-attribute name="header" value="/WEB-INF/layout/header.jsp" />
<put-attribute name="footer" value="/WEB-INF/layout/footer.jsp" />
</definition>
<definition name="home" extends="base">
<put-attribute name="body" value="/WEB-INF/views/home.jsp" />
</definition>
<definition name="registerForm" extends="base">
<put-attribute name="body" value="/WEB-INF/views/register-form.jsp" />
</definition>
</tiles-definitions> 


Explanation:
Here we are adding one header and one footer page inside "page.jsp" and passing our required jsp page as body.

<definition name="base" template="/WEB-INF/layout/page.jsp">
<put-attribute name="header" value="/WEB-INF/layout/header.jsp" />
<put-attribute name="footer" value="/WEB-INF/layout/footer.jsp" />
</definition>

Above page.jsp page behave as base page for all where we included header and footer.jsp.

<definition name="home" extends="base">
<put-attribute name="body" value="/WEB-INF/views/home.jsp" />
</definition>

In this tag we extends our base page where we already included header and footer.jsp and then redirect to our required jsp page.
here we are redirecting to home.jsp.

Now we will discuss our page.jsp

<%@ taglib uri="http://www.springframework.org/tags" prefix="s" %>
<%@ taglib uri="http://tiles.apache.org/tags-tiles" prefix="t" %>
<%@ page session="false" %>

<html>
<head>
<title>Spittr</title>
<link rel="stylesheet" type="text/css" href="<s:url value="/resources/style.css" />" >
</head>
<body>
<div id="header">
<t:insertAttribute name="header" />
</div>
<div id="content">
<t:insertAttribute name="body" />
</div>
<div id="footer">
<t:insertAttribute name="footer" />
</div>
</body>
</html>


Explanation

<div id="header">
<t:insertAttribute name="header" />
</div>

Including header part
header attribute coming from tiles.xml file

<put-attribute name="header" value="/WEB-INF/layout/header.jsp" />


<div id="footer">
<t:insertAttribute name="footer" />
</div>

including footer part:
this is attribute name="footer" from tiles.xml file
<put-attribute name="footer" value="/WEB-INF/layout/footer.jsp" />

for body 

<div id="content">
<t:insertAttribute name="body" />
</div>

attribute from tiles.xml
<put-attribute name="body" value="/WEB-INF/views/home.jsp" />


header.jsp
<h2>Header.jsp</h2>

footer.jsp
<h2>Footer.jsp</h2>


path of footer.jsp, header.jsp, page.jsp and tiles.xml is

/webapp/WEB-INF/layout/


Now we will create our controller class


package org.asif.tile.web;

import org.springframework.stereotype.Controller;
import org.springframework.ui.Model;
import org.springframework.web.bind.annotation.RequestMapping;
import org.springframework.web.bind.annotation.RequestMethod;
import org.springframework.web.servlet.ModelAndView;

@Controller
public class HomeController {

@RequestMapping(value = "/", method = RequestMethod.GET)
    public ModelAndView myModelMethod(Model model){
    ModelAndView mav = new ModelAndView("home");
    return mav;
    }
@RequestMapping(value="/registerform", method=RequestMethod.GET)
public ModelAndView registerForm(){
ModelAndView mav = new ModelAndView("registerForm");
    return mav;
}
}

ModelAndView mav = new ModelAndView("home");

here "home" must match with tiles.xml file name="home" tag.


<definition name="home" extends="base">
<put-attribute name="body" value="/WEB-INF/views/home.jsp" />
</definition>

here "home" view set in ModelAndView class view name will match with tiles.xml <definition name="home"
and our view will be <put-attribute name="body" value="/WEB-INF/views/home.jsp" />, home.jsp.

Here header and footer already added in page.jsp and that jsp we are using as base in tiles. 
So whenever we return a view from our controller will be added by header and footer jsp page.


home.jsp


<%@ taglib uri="http://java.sun.com/jsp/jstl/core" prefix="c" %>
<%@ page session="false" %>
<h1>Welcome Tile Integration</h1>

<a href="<c:url value="/registerform" />">Register</a>

its simple jsp where I am redirecting to other page, this first hit our controller and from controller we are going to decide which has to choose.


package org.asif.tile.web;

import org.springframework.stereotype.Controller;
import org.springframework.ui.Model;
import org.springframework.web.bind.annotation.RequestMapping;
import org.springframework.web.bind.annotation.RequestMethod;
import org.springframework.web.servlet.ModelAndView;

@Controller
public class HomeController {

@RequestMapping(value = "/", method = RequestMethod.GET)
    public ModelAndView myModelMethod(Model model){
    ModelAndView mav = new ModelAndView("home");
    return mav;
    }
@RequestMapping(value="/registerform", method=RequestMethod.GET)
public ModelAndView registerForm(){
ModelAndView mav = new ModelAndView("registerForm");
    return mav;
}
}


url : http://localhost:8080/TileSpringIntegration/

where 8080 depends on your tomcat port

myModelMethod() -> this method will hit on this url:  http://localhost:8080/TileSpringIntegration/

my home jsp page in browser


Where Header.jsp and Footer.jsp are added automatically.

path of home and register-form.jsp :   /webapp/WEB-INF/views

content of home.jsp

Welcome Tile Integration

Register


this home.jsp as return from controller as view and added as a body in the page using tile.

When we click Register link in home page then we will hit 

@RequestMapping(value="/registerform", method=RequestMethod.GET)
public ModelAndView registerForm(){
ModelAndView mav = new ModelAndView("registerForm");
     return mav;
}

and will hit tiles.xml file


<definition name="registerForm" extends="base">
<put-attribute name="body" value="/WEB-INF/views/register-form.jsp" />
</definition>

now it would redirect to register-form.jsp 

register-form.jsp content.

<h1>Register Form jsp</h1>


Sunday, 19 November 2017

Thymeleaf integration with Spring


Hi in this post I am Integrating Thymeleaf3 with Spring 4.

My System configuration:

Windows 10
Spring Tool Suite
Platform: Eclipse Neon.1 (4.6.1)
java version "1.8.0_131"

To create Thymeleaf Integration with Spring we have to follow these stesp:


1)Create a maven project


2)Select Maven project


3) Select option create a simple project(skip archetype selection)


4) Give group id and artifact id and some extra details and then finish.


After this step our maven project will be created but showing some error.
One error is inside pom.xml


If u hold your mouse on cross sign/error place then u can see this


and the message is:
                             web.xml is missing and <failOnMissingWebXml> is set to true

To avoid this problem we have to add some code in pom.xml (I will show u shortly).

Second thing is not an error but it is showing older version of Deployment Descriptor. We have to change this too.

Now my pom.xml

<project xmlns="http://maven.apache.org/POM/4.0.0" xmlns:xsi="http://www.w3.org/2001/XMLSchema-instance" xsi:schemaLocation="http://maven.apache.org/POM/4.0.0 http://maven.apache.org/xsd/maven-4.0.0.xsd">
  <modelVersion>4.0.0</modelVersion>
  <groupId>org.asif.thymeleaf3</groupId>
  <artifactId>ThymeleafIntegration</artifactId>
  <version>0.0.1</version>
  <packaging>war</packaging>
  <name>Thymeleaf3 Integration with Spring4</name>
  <description>In this project I am Integrating Thyemealf3 with Spring4</description>
 
  <properties>
        <project.build.sourceEncoding>UTF-8</project.build.sourceEncoding>
        <jdk.version>1.8</jdk.version>
        <thymeleaf.version>3.0.0.RELEASE</thymeleaf.version>
        <spring.version>4.2.2.RELEASE</spring.version>
        <maven.compiler.version>3.1</maven.compiler.version>
        <maven.war.version>2.6</maven.war.version>
    </properties>

   <!-- To avoid compiler and jre version -->
   <build>
        <finalName>${project.artifactId}</finalName>
        <plugins>
            <plugin>
                <groupId>org.apache.tomcat.maven</groupId>
                <artifactId>tomcat7-maven-plugin</artifactId>
                <version>2.2</version>
            </plugin>
            <plugin>
          <groupId>org.apache.maven.plugins</groupId>
          <artifactId>maven-compiler-plugin</artifactId>
          <version>${maven.compiler.version}</version>
          <configuration>
              <source>${jdk.version}</source>
              <target>${jdk.version}</target>
          </configuration>
      </plugin>
      <!-- removing web.xml file error problem -->
      <plugin>
             <groupId>org.apache.maven.plugins</groupId>
             <artifactId>maven-war-plugin</artifactId>
             <version>${maven.war.version}</version>
             <configuration>
                 <failOnMissingWebXml>false</failOnMissingWebXml>
             </configuration>
         </plugin>
        </plugins>
    </build>

<dependencies>
        <!-- Provided dependencies -->
        <dependency>
            <groupId>javax</groupId>
            <artifactId>javaee-web-api</artifactId>
            <version>8.0</version>
            <scope>provided</scope>
        </dependency>
        <!-- Compile dependencies -->
        <dependency>
            <groupId>org.springframework</groupId>
            <artifactId>spring-context-support</artifactId>
            <version>${spring.version}</version>
        </dependency>
        <dependency>
            <groupId>org.springframework</groupId>
            <artifactId>spring-webmvc</artifactId>
            <version>${spring.version}</version>
        </dependency>
        <dependency>
            <groupId>org.thymeleaf</groupId>
            <artifactId>thymeleaf</artifactId>
            <version>${thymeleaf.version}</version>
        </dependency>
        <dependency>
            <groupId>org.thymeleaf</groupId>
            <artifactId>thymeleaf-spring4</artifactId>
            <version>${thymeleaf.version}</version>
        </dependency>
    </dependencies>
   
</project>


After saving pom.xml you have to upate maven project.
Even after this if you observe deployment descriptor still it is showing old version like this


To change it to latest version we have to close project and then open again.

Now once I closed project and open again then you can see change


You can check that now Deployment descriptor becomes 3.1.

Simply maven update your project.
Now our project is created and having no error.

We will see our coding part now.
In this project for all configurations we are using Java class only, no xml file.

First we are creating ThymeleafConfig class in which we will do configuration of our thymeleaf.
Here is our class

package org.asif.thymeleaf3.config;

import org.springframework.context.ApplicationContext;
import org.springframework.context.ApplicationContextAware;
import org.springframework.context.annotation.Bean;
import org.springframework.context.annotation.ComponentScan;
import org.springframework.context.annotation.Configuration;
import org.springframework.web.servlet.ViewResolver;
import org.springframework.web.servlet.config.annotation.EnableWebMvc;
import org.springframework.web.servlet.config.annotation.WebMvcConfigurerAdapter;
import org.thymeleaf.TemplateEngine;
import org.thymeleaf.spring4.SpringTemplateEngine;
import org.thymeleaf.spring4.templateresolver.SpringResourceTemplateResolver;
import org.thymeleaf.spring4.view.ThymeleafViewResolver;
import org.thymeleaf.templatemode.TemplateMode;
import org.thymeleaf.templateresolver.ITemplateResolver;

@Configuration
@EnableWebMvc
@ComponentScan("org.asif.thymeleaf3")
public class ThymeleafConfig  extends WebMvcConfigurerAdapter implements ApplicationContextAware {

    private static final String UTF8 = "UTF-8";

    private ApplicationContext applicationContext;

    @Override
    public void setApplicationContext(ApplicationContext applicationContext) {
        this.applicationContext = applicationContext;
    }

    @Bean
    public ViewResolver viewResolver() {
        ThymeleafViewResolver resolver = new ThymeleafViewResolver();
        resolver.setTemplateEngine(templateEngine());
        resolver.setCharacterEncoding(UTF8);
        return resolver;
    }

    private TemplateEngine templateEngine() {
        SpringTemplateEngine engine = new SpringTemplateEngine();
        engine.setTemplateResolver(templateResolver());
        return engine;
    }

    private ITemplateResolver templateResolver() {
        SpringResourceTemplateResolver resolver = new SpringResourceTemplateResolver();
        resolver.setApplicationContext(applicationContext);
        resolver.setPrefix("/WEB-INF/views/");
        resolver.setSuffix(".html");
        resolver.setTemplateMode(TemplateMode.HTML);
        return resolver;
    }

}

*NOTE: If you change your package name then please don't forget to change @ComponentScan("Here please give your package name")

Even you can see your project in tomcat manager but if you try to access your project it gives you error that path not found.
Please take care of this.

 resolver.setPrefix("/WEB-INF/views/");
This is the place where I have to keep my html pages.

 resolver.setSuffix(".html");
we have to return only name of html page n complete path and extension will be add from here automatically.


Spring web Initializer class 

package org.asif.thymeleaf3.config;

import javax.servlet.ServletContext;
import javax.servlet.ServletException;
import javax.servlet.ServletRegistration.Dynamic;

import org.springframework.web.WebApplicationInitializer;
import org.springframework.web.context.support.AnnotationConfigWebApplicationContext;
import org.springframework.web.servlet.DispatcherServlet;

public class SpringWebInitializer implements WebApplicationInitializer {

    @Override 
    public void onStartup(ServletContext servletContext) throws ServletException {
        AnnotationConfigWebApplicationContext context = new AnnotationConfigWebApplicationContext();
        context.register(ThymeleafConfig.class);
        context.setServletContext(servletContext);
        // Spring MVC front controller
        Dynamic servlet = servletContext.addServlet("dispatcher", new DispatcherServlet(context));
        servlet.addMapping("/");
        servlet.setLoadOnStartup(1);
    }

}

So our integration is ok now we have to write our controller class.

package org.asif.thymeleaf3.web;

import org.springframework.stereotype.Controller;
import org.springframework.ui.Model;
import org.springframework.web.bind.annotation.RequestMapping;
import org.springframework.web.bind.annotation.RequestMethod;
import org.springframework.web.servlet.ModelAndView;

@Controller
public class HomeController {

@RequestMapping(value = "/", method = RequestMethod.GET)
    public ModelAndView myModelMethod(Model model){
    ModelAndView mav = new ModelAndView("home");
    mav.addObject("myName", "Md Asif Aftab");
    mav.addObject("myEmail", "asifaftab87@gmail.com");
    return mav;
    }

}


This is very simple controller class where I am returning two attribute to html page which I can display in my html page using Thymeleaf tag.

ModelAndView mav = new ModelAndView("home");
Here home is name of my html file -> home.html 

Inside 

     src->main->webapp

we will create folder WEB-INF, so final path 
      
     src -> main -> webapp -> WEB-INF

We have to create one more folder views 

     src -> main -> webapp -> WEB-INF -> views

This path we given in our ThymeleafConfig.templateResolver() - method so we have to follow the same to place our html page.

You can modify this but whatever path you are going to give same path you have to follow to create your html files.

Location of home.html 
           src/main/webapp/WEB-INF/views/home.html


home.html

<!DOCTYPE html>
<html xmlns="http://www.w3.org/1999/xhtml" xmlns:th="http://www.thymeleaf.org">
<head>
<meta charset="ISO-8859-1">
<title>Insert title here</title>
</head>
<body>
Name: <span th:text="${myName}" />
<br>
Email: <span th:text="${myEmail}" />
</body>
</html>


Done.
Thanks


Thursday, 9 November 2017

Add specific file or project to github


Here I will discuss how to add project in github.


First we have to install gitbash

download url: https://git-scm.com/download/win

Install file by using all default option n press next, next.

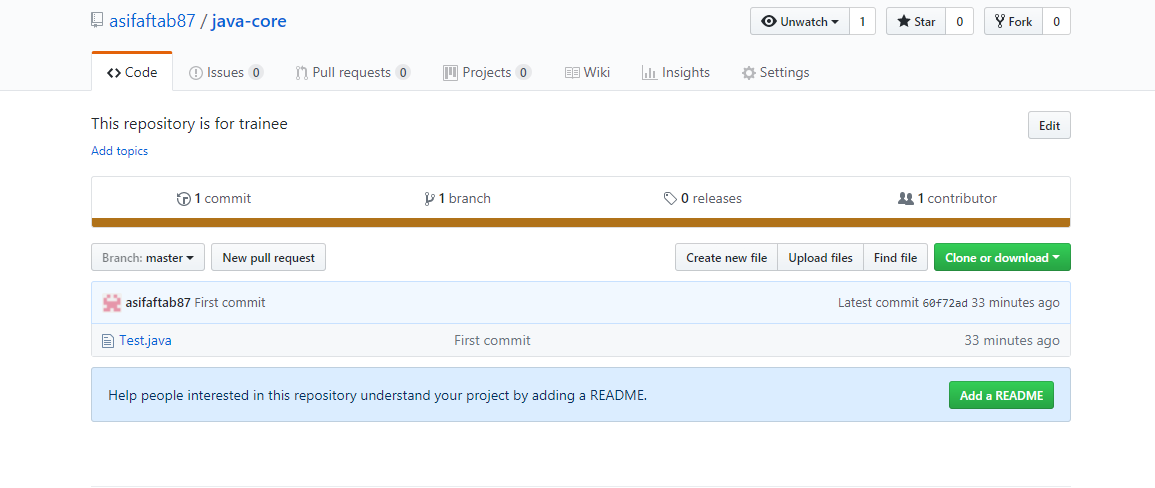
Suppose this is my page

url: https://github.com/asifaftab87/java-core


I want to add my project or file to this repository.
For this we have copy download link


Now I want to add First.java file to my repository whose url is:

https://github.com/asifaftab87/java-core.git


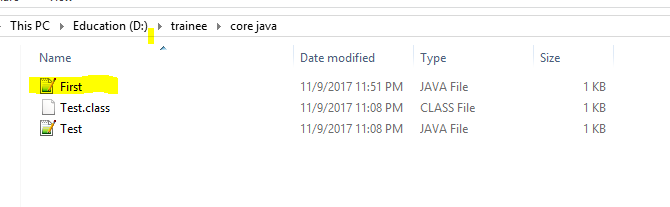
I will go to first my folder which has First.java file


In this folder we will open git bash by right click shown below


once we click on Git Bash Here option then one terminal will open like this


So our git bash terminal is ready to execute our command.

Now we will execute our command to commit our code to github repository.

You can also follow this url, I am always taking help of this page:

URL:  https://help.github.com/articles/adding-an-existing-project-to-github-using-the-command-line/

Initialize the local directory as a Git repository

 git init 


Add the files in your new local repository. This stages them for the first commit.

 git add First.java 


Commit the files that you've staged in your local repository.

 git commit -m "your message that describe your commit" 


In the Command prompt, add the URL for the remote repository where your local repository will be pushed.

 git remote add origin https://github.com/asifaftab87/java-core.git 


Push the changes in your local repository to GitHub.

 git push origin master 


Once u run git push origin master terminal would ask your githubId/github registered email id  and password.

Once done then your code already committed to your github repository.

git remote add origin remote url

Above command used only when we are adding a file/folder/project to a very newly created repository, e.g. if repository is new and nothing inside repository then we have to use

git remote add origin remote url

else we skip this command.

So to commit file/folder/project in git which is already having other project or old repository then commands are

 git init 

 git add First.java 

 git commit -m "your message that describe your commit" 

 git push origin master 


Saturday, 21 October 2017

Liferay build.properties

In this post I am going to discuss our build.[username].properties file.

I tried configure Liferay 7 and got this error 
"app.server.parent.dir" is not correct.

To configure Liferay environment previously I realized that this file namely 
build.[username].properties automatically created (but now may be I have some issue that this file is not generating automatically).
So to avoid this problem we first have to create this file.
[username] is name of computer user.

To know user name :

I created a folder namely workspace,

Inside this folder I extracted liferay-ce-portal and liferay-sdk


Suppose my system user name is user, so I have to create a .properties file and file name must be build.user.properties file else at the time of creation of portlet it throws error.

My workspace location, path of all folders and files(Windows).

WorkSpace Path: D:\liferayWorkSpaces\LiferaySeven
Liferay portal path: D:\liferayWorkSpaces\LiferaySeven\liferay-ce-portal-7.0-ga3
Tomcat path: D:\liferayWorkSpaces\LiferaySeven\liferay-ce-portal-7.0-ga3\tomcat-8.0.32
Liferay sdk path: D:\liferayWorkSpaces\LiferaySeven\liferay-plugins-sdk-7.0

Main content of this post :

build.user.properties
Path: D:\liferayWorkSpaces\LiferaySeven\liferay-plugins-sdk-7.0\build.user.properties

Content of build.user.properties

app.server.type = tomcat
app.server.parent.dir = D:\\liferayWorkSpaces\\LiferaySeven\\liferay-ce-portal-7.0-ga3
app.server.tomcat.dir = D:\\liferayWorkSpaces\\LiferaySeven\\liferay-ce-portal-7.0-ga3\\tomcat-8.0.32
app.server.tomcat.deploy.dir = D:\\liferayWorkSpaces\\LiferaySeven\\liferay-ce-portal-7.0-ga3\\tomcat-8.0.32\\webapps
app.server.tomcat.portal.dir = D:\\liferayWorkSpaces\\LiferaySeven\\liferay-ce-portal-7.0-ga3\\tomcat-8.0.32\\webapps\\ROOT
app.server.tomcat.lib.global.dir = D:\\liferayWorkSpaces\\LiferaySeven\\liferay-ce-portal-7.0-ga3\\tomcat-8.0.32\\lib\\ext